Sweet and Spicy Couscous

I’m a little addicted to the combination of avocado and mango. Of all the things in the world to be addicted to, I suppose it’s really not all that bad, and certainly it benefits you, my foodie reader-eater. I’d never eaten the combination before until a visit to a family-owned restaurant in San Antonio called Pam’s. Before then, I wasn’t even sure I liked mangoes, to be honest. But after this visit, I was all in, hook, line, and sinker. Avocado and mango just seem to complement each other very well, and together they can take a fair bit of spicy heat which I also appreciate. With my addiction in mind, in the summer months, I’m always looking for ways to combine the two flavors. After reading some other blog posts on easy summer salads, I thought I could most certainly make a variation on a couscous salad with mango and avocado. The best news is that it can be done in just the time it takes for the couscous to cook! A five-minute dish? Why yes, please, and thank you!

Sweet and Spicy Couscous

Ingredients
1 small avocado
2 Ataulfo mangoes or 1 med-large mango of the larger varieties (I tend to use the larger varieties)
1 medium jalapeño
1 serving of couscous (1/3 cup dried couscous)

Steps
1. Prepare your couscous according to box directions.
2. Dice and seed your jalapeño. Some jalapeños are naturally just hotter than others, but you can control most of the heat by seeding the pepper and cutting out the ribs, or membranes, along the sides. I usually go with a small dice. Put into a bowl that can ultimately handle all your ingredients.
3. Dice your mango. I recommend slicing your mango sides off, which will be just shy of where the pit is. Take each half and cut through the flesh lengthwise, but not through the skin, then rotate it 45 degrees to slice across the width without going through the skin, which will create cubes. Pop the center up and you can slice the cubes off. Add to your bowl.
mango half          mango sliced in cubes          mango popped, side view          mango popped, top view
4. Dice your avocado. I use a similar method of slicing through the flesh lengthwise, then widthwise, to have cubes inside the skin of the avocado. To get the cubes out, I gently squeeze the avocado half around in my hand to loosen everything up, then take a spoon and run it around the edges to scoop them out.   However, wait until after you add the couscous to add the avocado.
avocado cubes
5. When your couscous is finished, fluff it and let it cool for a minute. Add it to the mango and pepper. Stir.

cooked couscous

This needs fluffing.

6. Add your avocado, and stir ever so gently so it doesn’t smash up. You want to keep the cubes intact.
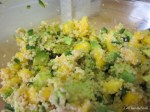
mixed up couscous
7. Taste for seasoning, and add salt if you want or some chopped cilantro like I did!

I’m not entirely certain the kind of mango I use because my grocery store seems to only label Ataulfo mangoes. A Google search turned up several results on mangoes with pictures. However the pictures of the other variations of mangoes look VERY similar to me so I am not sure. The mangoes I use are large, green, red, sometimes yellow, usually kind of firm, and not so fibrous. Either way, I’m certain it will be tasty.

Please remember to be quite careful after handling the pepper. Wash your hands immediately so you don’t transfer the capsaicin oil to your face or other body parts. Ouch! I’ve heard that Cutty Sark (Blended Scotch Whiskey, of all things!) works well to take the sting out if you forget and touch your mouth or nose. This is according to my friend Erin D. I believe she speaks from experience. Sometimes, I will make a paste with baking soda, a touch of dish soap, and water to wash my hands. That helps remove the oil, I think. Using an acid, such as lemon juice or vinegar, might also help to get the oil off. Alton Brown recommends using plastic gloves, and I have followed that practice on and off through the years.

I haven’t had a chance to try these ideas yet, but here are several variations I’m considering. A finely diced red bell pepper would be a fine addition to this salad as would a minced red onion. I wouldn’t put in a ton of either ingredient because they can be powerfully strong ingredients. Green onion, both the green and the white parts, would work well. Garlic would be a fine addition as might a drizzle of balsamic vinegar. Go easy on the vinegar, though. A little goes a long way. You could also substitute quinoa or rice for the couscous; it will just take longer to cook for both of those. Who doesn’t love a recipe that has so many experimental possibilities?! I think it’s so fantastic, myself. It’s also nice in the summer that it’s quick and doesn’t heat up your kitchen that much.

Tell me what your favorite summer salad combinations are! I’d love to try something new. I hope you enjoy sweet and spicy couscous as much as I do. It’s been on repeat in my kitchen several times this summer already. I’m sure it will be on the regular rotation until the ingredients no longer make sense for the season. Happy eating!!

Approximate Nutritional information: Makes 2 generous servings or 3 reasonable servings. Information is for 3 servings.
Calories: 234.5couscous ingredients
Fat: 10.7 g
Carbs: 34.3 g
Protein: 5 g
Potassium: 473.4 mg
Vitamin C: 64.7%

Pasta Carbonara

One of my criteria when I go out to eat is to order a dish that I can’t, or won’t, make at home. Why spend the money on a dish that I can likely make for less money with a higher degree of ingredient control in my own home? Do any of you all have this rule, also? Every so often, I will take a dish that has previously been deemed “out of my league” and tackle it at home in the hopes that I don’t have to wait to go out to eat in order to enjoy its deliciousness. Spaghetti carbonara was one of those dishes that was always deemed out of my league. Cooking eggs with carryover heat to create a sauce? I was skeptical, at best. I’d seen some shows on Food Network on how to make it, and I’d eaten plenty of plates of carbonara from local Italian restaurants. I was content to let the professionals tackle such a complicated dish. But then, one day, I just decided I would not be bested by eggs, cheese, pasta, and heat. Y’all, I’m here to tell you a secret. Listen closely. It isn’t all that complicated. Not.at.all. Here we go!


Pasta Carbonara – Serves two

Ingredients
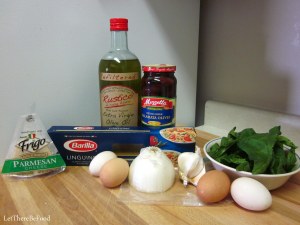
4 ounces pasta – I like linguine, personally
4 eggs: 2 whole and 2 yolks
1 cup grated Parmesan cheese
2 cloves garlic
8 Kalamata olives
1/3 cup diced onion
2 – 4 cups chopped spinach (I only had 2 cups this time, but I wish I’d had more.)
1 tablespoon of oil or butter (for cooking the onions – your preference)
Basil or parsley leaves for garnish if desired

Steps
1. Put a large pot of water on to boil for your pasta. Salt the water liberally as this is your only chance to season your pasta. A Food Network chef once said, “The water should taste like the ocean.”
2. While the water is boiling (and doesn’t it always seem to take forever??), dice your onion, drain, blot, and chop your olives, and grate your cheese.

3. Heat a skillet over medium heat. I typically use 5 out of 10 on the dial on my stove. Add your butter or oil, and let it heat up for a minute or two. Add in your onions, turn the dial down to 3 or 4, and let them sauté until they reach your preferred level of softness.
4. Usually while my onions are cooking, my pasta water is ready. Add your pasta and cook it for the time given on the box. This is semi-critical for the remainder of the recipe. I suggest you set a timer to keep you on track.
5. Crack your whole eggs into a bowl. Carefully crack the eggs you need to separate over the sink and separate using your preferred method, adding only the yolks to the bowl. Add the cheese and beat well. It will be thick, and this is okay.
6. Chop the spinach, and check on your onions to make sure they aren’t burning – just sautéing and even caramelizing just a bit.

7. With about 2 minutes to go on your timer, turn your heat down to low (I go with 1 or 2 on my dial), add your spinach to the onions and mix them together. The spinach will cook and wilt a little bit. You can cook it higher or longer if you prefer your spinach to be more wilted or cooked. I do not. Add your olives just at the last minute, and toss them around.
8. When the timer goes off, drain your pasta, and then add it to the pan of veggies. Gently stir to mix it all up. Now you can choose your level of bravery and comfort. Officially you can turn the heat off and proceed, or you can leave it just barely on low. It’s up to you.
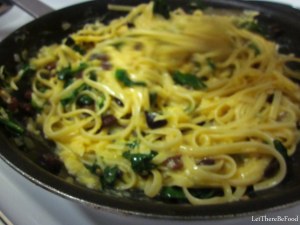
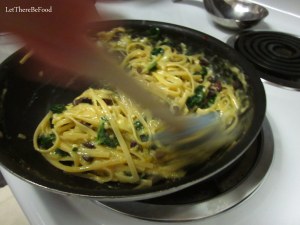
9. Once your pasta is all mixed up with the veggies, add your cheese-egg mixture, stir like crazy, and don’t stop for a good 90 seconds – 2 minutes. Keep stirring! For a split second, you may think it resembles something that might want to be a scrambled-egg pasta. Keep stirring, and something magical will happen as it transforms into a creamy, cheesy egg sauce for your pasta. It will be pale yellow/light white and well combined when all is said and done.
10. Transfer to a plate, top with your desired garnish, and enjoy your impressive feat.

Pour the sauce mixture into the pasta pan.

Stir and keep stirring!

Whip it around the pan!

Fold, turn, rotate, and keep stirring!

Don’t be shy now. Keep it up!

Soon and very soon you’ll have pasta sauce!

How ’bout them apples? It’s pasta sauce!

A few recipe notes: This is certainly not a traditional carbonara. Traditional carbonara is simply the pasta (which ought to be spaghetti to stay within tradition), the egg/cheese sauce and a crispy pork product like pancetta or bacon. The cheese should be Parmesan if at all possible. However, I first made this recipe for Meatless Monday, and I wanted to balance out what I assumed to be a high calorie/fat content with some vegetables and to add some additional flavors while removing the bacon. In my carbonara research, the “experts” and purists were emphatic that cream did not belong in a carbonara recipe. Nonetheless, there are many recipes out there with cream in them. My thought, however, is that there is already a CUP of cheese and FOUR egg yolks in this recipe. Do we really need cream? I think not, friends. Let us show some restraint somewhere. 🙂 Last note, I’ve mixed my sauce and pasta both over heat and off heat. For my current, personal comfort level, I prefer to mix it over the barest level of heat, but I’m also sure that the one time I did it off heat, my boyfriend and I survived without contracting food-borne illness. So maybe one day soon, I’ll graduate to full off-heat mixing.

Since I’ve clearly made my peace with a non-traditional carbonara dish, I do encourage you to experiment with variations of your own pasta carbonara. To me, this dish is simply begging to be experimented with, be it with pasta type, different kinds of veggies, or various kinds of crispy pork bits. So far, I’ve made my carbonara with combinations of kale, spinach, onions, shallots, garlic, tomatoes, Kalamata olives, green onions, bacon bits, and broccoli. The combination I gave you above is my preferred Meatless Monday combination. I did really enjoy the crispy bacon bits the one time I had them, but they aren’t a deal maker for me. The green onions are also really nice on top. A word of caution about the tomatoes, if you choose to try them: they will make your sauce much looser than you might anticipate. As they are made up of so much water, it’s hard to get it all out before you cook them; they will release their liquid into your skillet, and thus, it will end up in your sauce which will be a little thinner and a little pinker than you were ready for. Just a heads up. I’d love to know what combination of vegetables you use in your pasta carbonara!

If you are unused to separating eggs, let me offer you a few tips. First of all, you do not need any special kitchen gadgets to separate eggs! And this is serious business coming from a lover of all kitchen gadgets. Your clean hands or the egg shells will work just fine. Some folks prefer to use their hands to separate the egg, cracking it and pouring it into their hand over the bowl or sink, depending on which part you need. You can let the whites run out between your fingers, leaving the yolk behind. Alternatively, you can carefully crack the egg in as close to half as you can get and then, leaving the yolk in one half of the eggshell, let the whites run out over the edges. Gently shift the yolk to the other half of the yolk, and the rest of the white will run out; if you do this maybe 3 or 4 times, you will get a white-less yolk.

Sometimes the yolks break and that’s okay.

If you are cooking for one, this is a great dish for that as it scales easily. Just adjust your eggs at one egg and one yolk per person and a half cup of cheese per set of eggs for the sauce. Past that, it really is all about your vegetable preference. When I’m making it just for me and not for my blog, I’m less likely to measure and just to eyeball instead. Maybe it’s a little extra onion-y and garlicky that night, but if it’s just me, who cares? I encourage you not to care either. Throw caution to the wind, and go with what your taste buds tell you sounds good!

Leave me a comment, and share what veggie combinations you have tried or are planning to try. I’d love some inspiration myself, and it is always good to share the foodie love with others. Good luck and don’t be intimidated; you can do it! Happy eating!

Nutritional content: per serving
Calories: 643
Fat: 43.3 g
Carbs: 49.8 g
Protein: 38 g
Calcium: 79.2%
And that’s without the bacon or pancetta, y’all! I may never put bacon in it again!

Roasted Garlic

Until recently, I thought everyone knew about roasted garlic. I’ve seen other bloggers post about roasting garlic and read through their posts to make sure I wasn’t missing anything. Nope. We’ve all got it, so why are we continuing to post about it? Why am I here adding to the blogosphere with another roasted garlic post? Well, my friends, I’ve learned that not everyone knows what roasted garlic is or that they can make it themselves to avoid paying $8 for it at a restaurant. That is quite possibly one of the biggest restaurant mark-ups out there I’ve ever seen. So sweet food lovers, I’m happy to share with you the various ways I’ve made roasted garlic, what I do with it, and why I encourage you to make it at home instead of eating it out.


Roasted Garlic

Ingredients
Bulb of Garlic
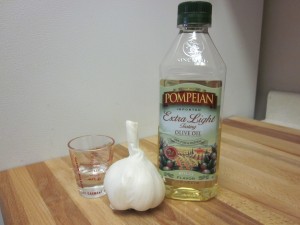
1 teaspoon light olive oil
1 tablespoon water

Steps
1. Preheat oven to 400 degrees.
2. Slice off the top third of the head of garlic, and peel off a few of the extra layers of the papery skin. Leave the last layer or two. You won’t need the top third for the recipe. We’ll talk about what to do with it later.
3. Put your head of garlic in an oven-safe dish along with the tablespoon of water.*

Oven Ready Garlic

4. Drizzle the teaspoon of olive oil over the top of the head of garlic.
5. Cover the dish and put in the oven for 45 minutes.
6. Check garlic to see if the cloves are soft and if it’s starting to turn brown. It might need another 10 – 15 minutes. Your goal is soft, brown, and a little bit caramelized around a few of the edges.

Soft, brown, and caramelized (and the pan cleaned right up!)

7. When you take it out of the oven, let it rest for a few minutes so that it burns neither your mouth nor your hands.

*Alternatively, you can wrap your bulb of garlic in a piece of foil so it’s a snug little bundle. If you go this route, omit the tablespoon of water, and just go with the teaspoon of oil. I’ve also used this method. I like it as it reduces the number of dishes you have to wash. The dish/water method seems to keep the garlic from over-browning and reduces waste. It’s your kitchen so you can make the call for your preferred method. The water will evaporate throughout the cooking, and it will get brown in the bottom of your dish, but don’t freak out. This will wash off.

There have been times when I have wanted a few cloves of roasted garlic but didn’t want to roast an entire bulb of garlic. In these cases, I will take a few individual cloves of garlic, leave them wrapped in the skin, bundle them in a piece of foil with just a dollop of light olive oil and cook them in the oven along with whatever I’m baking or during my preparations for the rest of my dinner. As it usually takes me 35 – 40 minutes to make dinner, this is just about the right amount of time to roast the individual cloves. Again, you are looking for the cloves to be soft and browning at the ends. They might be oozing a little bit too; this is a sign of done-ness. For this to happen, your oven needs to be at least 350 degrees. If it’s higher, you should check on the cloves starting around the 25-minute mark.

Decisions…decisions…

When you chop off the top third, you are left with a decision. Many folks just toss it because it’s full of tiny little pieces of garlic that are difficult to do anything with. If you are like me, or have a grandmother like mine who has greatly influenced you, perhaps you feel badly wasting anything including tips and pieces of garlic. I tried once roasting the top third with the rest, but that didn’t end well, so I don’t recommend it. But you could mince it up to go into your meal, or save it to mince later. Just remember to mince it soon as the cut pieces don’t save for too terribly long. It’s also okay if you just throw it away. It’s your kitchen and nobody will know.

My spreader of choice

There is so much you can do with roasted garlic. As one of my dear girlfriends has said, you can start with smearing it on your face and go from there. It is that good. The last time I made it, I took all the cloves out of the head of garlic to put into an aioli. I’ve put roasted garlic on toast, then topped it with cheese or tapenade or bruschetta. I like to put roasted garlic in mashed potatoes or mixed in my baked potatoes. You can smush it through a garlic press into pasta, soup, omelets, or anything else that strikes your fancy. Because roasted garlic has a much more mellow flavor than raw garlic as well as being so spreadable, it can be used as a good substitute for butter. When I was eating my gallbladder low-fat diet last year, I did a lot of roasted garlic-substituting. I did try once leaving out the oil, but it didn’t roast quite as well. The oil helps its spreadability as well the browning of the garlic. Without the oil, the garlic is sort of a pale, anemic color and is difficult to spread.

I got all the cloves out!

Let’s talk about why I believe you should never order the roasted garlic appetizer in a restaurant. At the grocery store, garlic can be 2 for $1.00 or for a real deal, 4 for $1.00. I cannot think of a time when I’ve seen it be more expensive than $0.50 for a head of garlic. Most of us have a bottle of olive oil in our house. Yes, I want to encourage you to use light olive oil which may require owning 2 bottles, but regular olive oil could suffice if you just wanted to have the one. But once you’ve purchased the one bottle of oil for likely somewhere between $5 and $9, depending on brand preference, you can have so many heads of roasted garlic out of that bottle for the price of one appetizer of roasted garlic from your local eatery. There is a fancy-pants restaurant here in Austin where you can order roasted garlic bulbs with toast points for $8.95.  I do vaguely recall they are generous enough to give you two bulbs. Even so, at approximately $4.50 for a bulb with a couple of pieces of toast, it’s not a great deal. Y’all, make this at home. Take your $8.95, get two bulbs, a loaf of French bread, some yummy cheese, maybe some tasty meats or olives, and make a full spread of it. I like to do this regularly, and I highly recommend it.

Roasted garlic cloves for aioli

The reason why I encourage you to use light olive oil over extra virgin olive oil for roasting your garlic is because I have read that the smoke points for the different kinds of olive oil vary with the smoke point for light olive oil being higher than extra virgin. Bad things happen to oil when it reaches the smoke point. First, the oil begins to break down and create free radicals which are bad for your body. However, they are not nearly as bad as flames in your oven, which is the other concern of oil reaching the smoke point. The smoke point isn’t too far from the flash point where the oil could break into flames. Danger, Will Robinson, danger. At the same time, there is A LOT of data out there on the various smoke points for oils, and they don’t all say the same information. This website is all about olive oil and has good information about smoke points so you can educate yourself to make your own decision. One blogger doesn’t even recommend using olive oil anymore; you can read about that and using ghee instead, if you like.

Spread the good word about roasted garlic, y’all. I’ve learned that too many of my dear friends have never eaten it or don’t know how to make it at home. It’s just not right. We shouldn’t be paying $9 for it at restaurants. We can roast our own garlic to use in a plethora of ways! It even keeps in the fridge for about a week if you want to spread out using it. We have options and they are delicious! But do spread the good word so that others can know the joy of roasted garlic. Happy eating!