Jalapeño Bacon Deviled Eggs

I am so excited to share these deviled eggs with y’all! Right before New Year’s Eve, I got a hankerin’ for deviled eggs, pretty much out of nowhere. I’m okay with the regular deviled eggs we’ve all seen at potlucks and parties, but my taste buds really wanted more. Somehow I got the idea to put jalapeños in the mix. Then I thought to myself, “I bet bacon would be delicious with eggs and jalapeños!” A quick Google search showed some recipes with jalapeños, but not too many with bacon. I can fix that! My friends, pull up a chair to my table and bring your deviled egg appetite as I share this most delicious recipe with you. They are freakishly tasty so get to making them soon; I promise you’ll be glad you did!

Jalapeño Bacon Deviled Eggs (inspired by this Southern blogger)

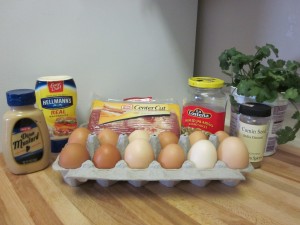
Ingredients
6 hard-boiled eggs
2.5 tablespoons good-quality mayonnaise
2 teaspoons Dijon mustard
1 teaspoon ground cumin
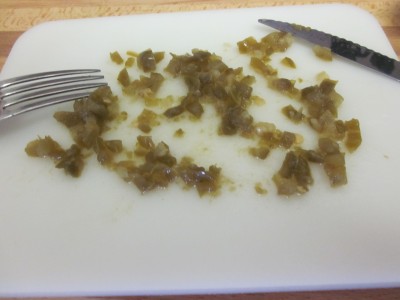
1.5 tablespoon diced pickled jalapeños
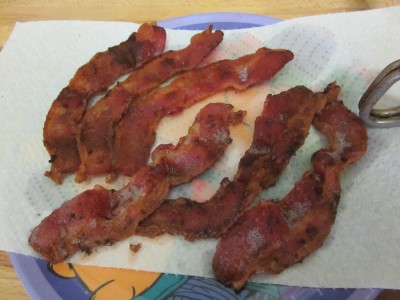
4 slices cooked bacon – crumbled (6 if you want to garnish with bacon as well)
pinch of salt
Cilantro – for garnish

Steps
1. Cut your eggs in half lengthwise, and scoop out the yolks into a bowl. Place whites onto a plate.
2. In your bowl with the yolks, add the mayonnaise, mustard, cumin, diced jalapeños, and crumbled bacon.

3. Using a fork, mash and mix until everything is well incorporated. I did have to switch to a spoon at the very end to get a smoother consistency.
4. Taste and see if it needs a little salt, more cumin, or more heat. If it needs more heat, you could use some juice from the pickled jalapeños. Adjust seasonings as needed.
5. Using a spoon, carefully scoop a large dollop of the mixture back into the egg whites. You’ll have plenty to make a nice mounded top as you’ve just increased the volume of the yolks quite a bit.
6. Garnish with a piece of crumbled bacon if you want additional bacon. (And who doesn’t?)

mmm...bacon

7. If you want to garnish with cilantro, give it a rough chop and sprinkle on top. You could alternatively combine it into the yolk mixture as well.

I’ve made these twice now, and with the exception of folks who don’t like cumin or deviled eggs in general, everyone has been in LOVE with them. They’ve gone like the proverbial hotcakes. I seriously wish I had a reason to make deviled eggs all the time so I could eat them all the time. Maybe that wouldn’t be a healthy or balanced choice, but my taste buds don’t care. If you have friends who are finicky about spice or cumin, you could certainly adjust those amounts. I did that when I made them recently for my friend who doesn’t like spicy foods. I went with just a tablespoon of jalapeños, but even he said he would have been okay with more. So far, every time I’ve made them, I’ve been with my friends who are anti-cilantro so I have yet to mix in the cilantro, but I am keeping my eye out for the opportunity to do so. To date, it’s just been a garnish on top which is still delicious.

More jalapeños, please!?

Here is how I boil my eggs, in case you are on the prowl for the best way to boil eggs. I used to try out a variety of different methods, but finally settled on this method that I now use faithfully. Here goes. It’s quite simple.
1. Put your eggs in a pan, cover them with cold water, put a lid on the pan, and put on the stove.
2. Bring to a boil over medium-high heat. I use 6 or 7 out of a 10 dial.
3. As soon as it comes to a boil, remove from heat, and let sit in the hot water for 10 minutes.
4. At the end of 10 minutes, drain off the hot water, and rinse with cold water. I let them sit in cold water, even adding ice to help cool them down and prevent carry-over cooking.


If you wanted your yolks less done, you could and should cook them for less time. Here is a site with a guide on cooking times. However, I have not yet done this. I will soon though, as I plan to make Scotch eggs which call for boiling the eggs, wrapping them in sausage, and then either baking or frying them. Are you drooling yet? Maybe the sausage wrapping keeps them from overcooking in the second round of cooking, but I think I’ll probably medium-boil the eggs in case they cook a little more in the oven. And if they don’t, there is nothing wrong with a slightly runny yolk in my book. I’ll keep y’all posted on how those gems turn out.

Peeling hard-boiled eggs can be tricky. Over the years of trial and error, of experimenting with crazy things like vinegar in the water, blowing in the egg shell (oh, yes I did!), and other craziness, here is what I have determined. Older eggs peel better. If you buy eggs at the store, boil them up them up in the next few days, and go to peel them, you may want to commit eggicide. The egg will stick to the shell as you peel, causing bits and pieces of the egg to break off, leaving you with an egg that is pockmarked like the face of an unfortunate, acne-scarred teen. If you wait a week or so, the story will turn out differently. Start at the large end of the egg because there will likely be a pocket of air, with potentially a little bit of liquid. This will help you get a good start on the peeling. Peel carefully, but nearly every time the shell will just come right off in one or two large pieces. You may feel the heavens open up and egg-peeling angels sing. I understand this feeling. 🙂 My current exception to this rule seems to be eggs from the farmer’s market.

Recently, I was persuaded to purchase my eggs from one of our local farmer’s markets. To be honest, it took a little bit of talking myself into it because eggs at my grocery cost me about $1.27. These eggs cost me $4. You are a smart cookie and can do the math your ownself to see the difference in cost. However, research had told me that this was a good price for farm eggs in the Austin market and that cage-free eggs from Kansas at HEB (my local grocery store) would run me about $4.25. My father had heart failure upon learning that I paid $4 for my eggs. He is a fortunate enough soul to have a farmer hook-up and only pays $2 a dozen. I won’t tell you where he lives so you can’t picket his home. May we all be so lucky one day. Anyway. I committed the cardinal egg-boiling sin of buying my farm eggs the day prior to making my deviled eggs. I just wasn’t thinking, to be honest. When I realized my mistake, there was nothing to be done, but proceed. When I started peeling, I was so astonished!! These did not peel like store eggs at all! My first egg peeled like it was touched by the peeler gods or something. A few of the eggs did have the bits and pieces problem, but not at all like newly-bought store-bought eggs do. It was simply amazing. I’m not certain yet why there is this difference, but if you know, tell me! Thanks!

The two that gave me trouble.

If you are experimenting with boiling your eggs, or as some websites like to call it – hard-cooking, if you get egg yolks that have a silver or green ring around the yolk, that is typically an indicator you’ve overcooked them. My sister-in-law told me once that the texture of the yolk also was an indicator. If it’s tough or rubbery, then it might be overcooked. However, I’ve also heard that to be an indicator of age, so I’m less sure on what that means. Also, if you boil up a bunch of eggs, but then forget which eggs in the fridge are boiled and which are raw, just give them a spin on the counter. A cooked egg will spin faster and more immediately than a raw egg. Here is a video that will show you. Watch out for the hammer at the end!

I hope you have an opportunity to make these deviled eggs soon. You and your friends will VERY happy! The last time I made them, my boyfriend informed me that we were going to have to start doubling the recipe. That’s a lot of eggs, y’all, but it’s worth it. Happy eating!

Nutritional Information – 1 deviled egg half, including bacon garnish      
Calories: 77
Fat: 6.5 g
Protein: 4.3 g
Potassium: 51.4 mg
Vitamin A: 2.9%

Crepes: A Delicious Blank Canvas

Happy New Year, everyone! I hope the holidays were enjoyable, peaceful, and full of tasty treats for you all. My family had some of the best smoked salmon that I think any of us have ever had. I made crazy delicious slow cooker ribs and jalapeño-bacon deviled eggs which will appear on the blog before too long. We ate so very well all holiday long. It’s interesting to me to note that we all seem to eat such delicious foods during the holidays, and then in the new year, it seems that as part of the “eat healthfully” resolution most people inevitably make, somehow delicious food gets thrown to the wayside. Friends, this does not have to be the case. One of my delicious, “treat” foods that I love to eat and make for entertaining or a special breakfast is crepes. It sounds so fancy when you tell someone you’ve made crepes! The crepes are tasty, your friends feel special, you feel like a big-chef-deal.  Everyone wins! For a long time I was intimidated by crepes, but that was silly of me. I am here to tell you that you do not have to be intimidated by them, either. The recipe I use has 5 ingredients, and the cooking part is really simple, too. I was asked tonight at a party if I make complicated food. Sister, please. Read on, then you tell me.


Crepes (Ingredients taken from this Alton Brown recipe; method adapted)

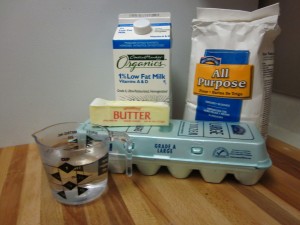
Ingredients
1/2 cup water
2 eggs
1 cup flour
3/4 cup 1% milk
3 tablespoons melted butter
potentially a smidge more melted butter for coating the pan

Steps
1. Melt your butter and let it sit to cool just a little bit while you measure and combine the other ingredients.
2. In a blender (Yep! Blender!), add in all the other ingredients and then the butter. I put them in the blender in the order shown in the list. I think it keeps the flour from getting gunky on the blades and helps the eggs to mix faster.

3. Blend until smooth. My blender doesn’t have a setting for anything similar to batter so I use the “sauce” setting. Usually I go for about 20 – 30 seconds, stop, scrape down the sides, and go another 10 – 15 seconds. It will look very similar to pancake batter, only thinner.

4. Now you leave it alone. It will need to sit for a while to rest and let the air dissipate. I leave mine on the counter for 45 – 55 minutes. If this makes you uncomfortable, put it in the fridge for 45 minutes, then pull it out for 10 minutes to come to room temperature before you start cooking.
5. Using a small skillet, preheat it on medium low. Now, depending on your non-stick pan’s true non-stick factor, you may or may not need butter. One of my skillets needs butter. The other does not. We’ll talk more about this below. But to be on the safe side, use a pastry brush or paper towel, and spread some butter around the pan.
6. Using a 1/4 cup measure, scoop out some batter. Lift the pan off the stove, tilt, and rotate like you were rolling a marble around the inside edge all while pouring the batter into the center of the pan. It will spread and pour over itself making a thin layer. Usually I rotate the pan 3 times, although sometimes twice if it was a scant 1/4 cup.
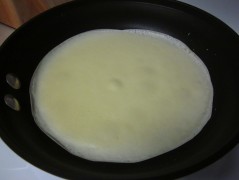
7. Put the pan back on the burner and set a timer for 2:30 (2 minutes and 30 seconds). You’ll notice the edges get crispy and the crepe start to turn opaque and thicken. When the timer goes off, you should be able to carefully, but easily, slide a spatula under and flip. It is likely to be firm enough that this will go easily and quickly.
                   
8. Set the timer for 1:30. When it goes off, have a plate ready and simply tilt your pan, with the spatula to help slide your crepe out. It will just slide right out. Sometimes I just hold my spatula under the pan and flip it over and let the crepe fall on my spatula.
9. Measure, tilt, rotate, time, flip, time, slide – repeat.
10. Fill or top with any number of things that sound delicious to you.

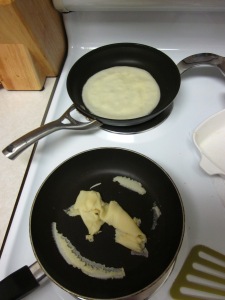
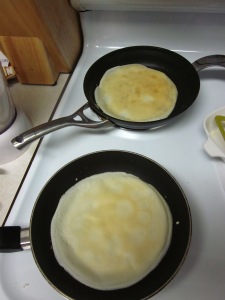
So there you have it: the fundamentals of crepe making. Now I’m going to be very frank with you. You should be prepared so that you don’t panic or think you did something wrong. With 2 exceptions, every time I’ve made crepes, my first one turns out terribly. It doesn’t set right, it doesn’t flip right, it comes apart, it is a terrible, awful mess.  But it still tastes good, y’all. 🙂 I tell myself that the first one is a sacrifice to the crepe gods and it helps season the pan, because the rest turn out beautifully. I’ve wondered if the difference is my non-stick pans. I’ve wondered if the difference is using the fridge to let them rest versus letting them rest on the counter. To date, I’m not certain I’ve done enough culinary research to be certain. This last time, with no butter in one pan, the first one turned out just fine. The other pan thoughtfully provided me the opportunity to photo-document how it can look on your first terrible awful mess of a crepe. But then I put a little butter in the pan, just for the very next crepe and no more, and it was just fine. So when you make these and the first one is a disaster, nod to yourself that this is to be expected, eat it while the others are cooking and proceed on calmly.

The Sacrifice

When you are using the butter for greasing the pan, it is better if it is melted because you can just use your method of choice to wipe the pan with butter quickly rather than slicing a piece of butter, waiting for it to melt (even if it does happen quickly in a hot pan), and then rotating the pan around to make sure it gets everywhere. Just use a brush or paper towel to be thorough the first time. My experience is that I really only have to do this for the first crepe or two. Somehow, after that, the pan has enough butter on it or mysteriously is otherwise ready to correctly cook and release my crepes. This means you don’t need a lot of extra butter. Sometimes I’ll use whatever is left in my receptacle from melting the butter earlier. Even if I use butter, sometimes the first crepe still is rebellious and chooses to be a disaster. Remember, this is no reflection on you.

You may also need to make some minor adjustments as you work your way through the batter. As I cook my crepes, if I feel like they are getting too dark, or too crispy, I may either adjust the heat down to 3 or 3.5 on the dial or reduce my cooking time to 1:45 or 2:00 for the first side and 1:15 or 1:25 on the second side. It’s a little like cooking pancakes in that regard, in my opinion. As the skillet continues to heat, you may need to account for that in your cooking time, but then if it cools too much because you’ve turned it down a notch, don’t be afraid to cook a little longer or turn it back up. As you have less batter toward the bottom of the blender, it is easier to pour into the measuring cup rather than scoop. But eventually you’ll have more and more scant 1/4 cups. These will take the shorter cooking times also.

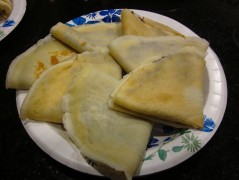
This crepe batter is a very basic, plain batter which makes it perfect for EVERYTHING! There are some recipes out there that have you add vanilla and sugar if you are making sweet crepes or herbs if you are making savory, and you can certainly do that. It’s your kitchen after all. However, I never quite know exactly which direction I’m going to go in when I make mine. Frequently I end up with both sweet and savory, so I stick with the plain batter. One of my favorite ways to eat these is filled with peanut butter and honey for breakfast. A more traditional route is with Nutella and bananas. Recently at a progressive dinner party, I had the Nutella with sliced bananas and blackberries option as well as herbed goat cheese with caramelized onions. Both were a smashing success. My improvement for the future would be to have smaller pieces of the caramelized onion so they are easier to eat. However, the flavors were simply divine. You can keep these in the fridge for about a week, or freeze them if you think you might somehow have them around longer than that. Such a thing doesn’t happen in my kitchen. If I am reheating them, I microwave them for about 10 seconds or so, and they are good to go. You can roll them or fold them as they are quite pliable.

While I haven’t done it yet, I’ve contemplated a “crepe casserole” with layers of shredded chicken, some sort of soft, melty white cheese, some caramelized onions and/or roasted garlic. It seriously makes my mouth water. You could also do layers with fruit and Nutella or a caramel sauce. When creating your filling, it is important to keep the pieces thin and small. This makes it easier to eat as well as keeping the crepe from tearing, and thus keeps it looking nice. It also allows you get all the different fillings in every bite, and that is very important, people. This is serious crepe business.


I hope you are brave enough to try making crepes at home. It’s so very easy. I use both my little skillets to make it go faster and typically use the cooking time to take care of various kitchen chores I’ve been avoiding like loading/unloading the dishwasher. You can’t venture too far from the stove anyway, so why not make good use of your time while in the kitchen? It’s also very easy to double in which case, if you have two skillets, definitely put both of them to work. I doubled it for our progressive dinner and got 23 crepes including the rebellious one. Please share with me how it goes for you and how you topped/filled them. I’d love to hear your stories! Happy eating!

Nutritional Information per crepe– recipe yield of 12 crepes (will change if you make more or less)
Calories: 82
Carbs: 8.7 grams
Fat: 4 grams
Protein: 2.7 grams
Calcium: 2.4%