Homemade Chicken Teriyaki

Greetings, my long-lost fellow food lovers! It has been so very long since we last saw each other. Has your life also undergone drastic changes in the last 12 months?? To catch everyone up, I got engaged in March, moved and started a new job in July, and got married in September. 2013 turned out to be a mighty crazy year, but it was a good one. I hope it was excellent for you also. One of my favorite recipes to come from 2013 was homemade chicken teriyaki, and I am SO stoked to share it with you! It’s absolutely finger-lickin’ good!

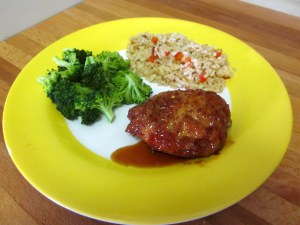
chicken teriyaki on a plate

I’m kind of particular about Chinese food. I don’t eat at Chinese restaurants much because I’m not always sure about the ingredients I’m eating, there’s the whole “you eat and are hungry 20 minutes later” thing, and I’ve rarely eaten at a Chinese restaurant and thought, “I must go back!!” Just doesn’t happen for me. On top of that, I rarely make Chinese food at home because it always seems quite complicated, and requires ingredients I never have on hand. Given that context, I have no idea what on earth prompted me to try America’s Test Kitchen’s Chicken Teriyaki the first time…maybe I just had all the ingredients? Whatever it was, I am thankful as this dish has become a regular in the rotation. In fact, this is the dish that Husband asked for on Valentine’s Day… it is THAT good. 🙂

Homemade Chicken Teriyaki (courtesy of America’s Test Kitchen – slightly amended)

Ingredients
2 – 4 bone-in, skin-on chicken thighs
1/2 tablespoon vegetable oil
1/2 cup low sodium soy sauce
1/2 cup sugar
2 tablespoons white wine
3 teaspoons grated fresh ginger
2 cloves garlic, minced
1/2 teaspoon cornstarch
1/8 teaspoon red pepper flakes
2 scallions, thinly sliced – optional

Steps
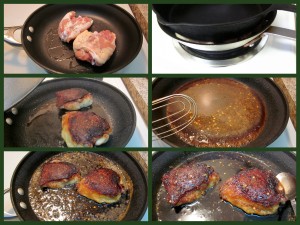
1. Heat oil in a non-stick skillet on medium-high until it shimmers, about 2-4 minutes. Place dry chicken, skin-side down in the pan. Place another, heavy pan or skillet on top to weigh the chicken down while it cooks. Leave it alone for 15 minutes.
2. While chicken is cooking, mix your sauce. Combine soy sauce, sugar, white wine, ginger, minced garlic, cornstarch, and red pepper flakes in a bowl. Whisk until the sugar and cornstarch dissolve and the mixture is smooth.
3. Turn the chicken, and cook skin-side up for another 10 minutes. If you would like to use a meat thermometer, your goal is 170 degrees.
4. Remove chicken to a plate lined with paper towels to drain. Pour off the chicken grease from the pan.
5. Whisk your sauce to recombine and pour into skillet over medium heat. Let come to a simmer, whisking or stirring occasionally so it doesn’t stick or burn.
6. Add the chicken thighs back to the pan and spoon the sauce over the top. Spoon and simmer for several minutes as the sauce continues to thicken and get shiny. This should take 3 – 5 minutes.
7. Scoop your chicken and a generous portion of sauce onto a plate with your desired sides and eat up!

From raw chicken to sauced chicken

This recipe comes from one of the Test Kitchen’s 30 minute recipe cookbooks, and the few times I’ve timed it from start to finish, it’s taken me 34 – 36 minutes if I’m moving efficiently. I feel pretty good about that timing! Of course, it doesn’t take into account also managing sides to go with your dinner so it can help to have a partner in the kitchen to keep it all moving along so you can have dinner on the table in a timely fashion. We’ve eaten this with numerous iterations of rice, broccoli, carrots, and even pasta on the side. I recommend any of those to you!

up close chicken

Having made this dish about a zillion times now, I have a few helpful hints for you.

  • The use of the heavy pan or skillet on top of the chicken is critical to producing the crispy skin on the chicken. It helps press the thigh down into the hot pan, flattening it a bit, and increasing the surface area ratio of the skin to hot pan. I use a cast iron skillet or a Dutch oven.
  • Use a screen guard when you flip the chicken. This recipe generates a fair bit of grease, and it spatters. Kind of a lot.
  • The chicken should come right off the pan and be easy to flip from the first to the second side. If it resists, give it another 2 – 3 minutes. Don’t dilly-dally, trying to get it to flip. See aforementioned spatter.
  • If you have a flat whisk, it works wonders in the sauce when you first put it into the pan. If you don’t have a flat whisk, spend the $7 – $10 to get one. I use mine ALL THE TIME.
  • This recipe makes a generous portion of sauce because I like lots of sauce for my rice and any leftovers. You could cut it in half for 2 thighs and still have generous sauciness.
  • The flavor components (garlic, ginger, red pepper) really can be amended to your personal tastes. If you want it spicier, try adding more ginger or red pepper.

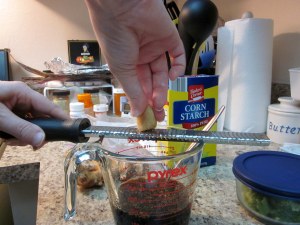
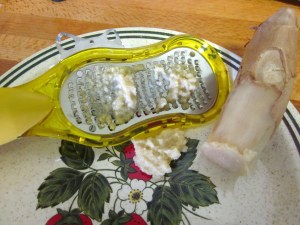
Grating ginger directly into the sauce
Grating ginger to measure

When I started making this dish, I was a little skeptical about skin-on, bone-in, chicken thighs. That seems to be the TOTAL opposite of everything I’ve ever heard about eating chicken. I mean, don’t we all eat boneless, skinless chicken breasts? Isn’t that the thing to do? However, I am 100% convinced there is no way this dish would work with boneless skinless chicken breasts. This meat needs the bone to help it stay moist and tender while cooking at a high heat. It needs the skin to protect the chicken and to develop the most ah-mazing crispy skin that takes well to the teriyaki sauce. Trust me, you want that crispy skin! If you are a white meat eater only, take a deep breath, pre-heat your skillet and give it a go – at least once. I have no reason to believe you will be sorry.

cooked chicken
I think the chicken reheats pretty well, although the skin loses a touch of the crispy factor. Nonetheless, the flavor is still finger-licking-good. I’ve taken it to work for leftovers and been quite satisfied. The sauce also keeps well for a few days covered and refrigerated, if you end up with extra sauce, but no chicken. Pour it over veggies or rice and add some zestiness to yet another meal! I really don’t think you can go wrong…even if you choose to eat it by the spoonful like some members of my house do.

Let me know how you like it and what side dishes went with your chicken teriyaki. I’d love to hear how it went for you! Happy eating!

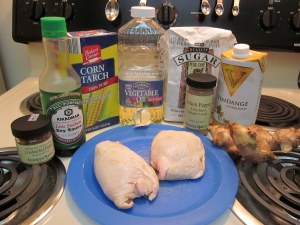
PS – Pictures from the kitchen in Austin and the kitchen in Miami were used to illustrate this blog. 🙂
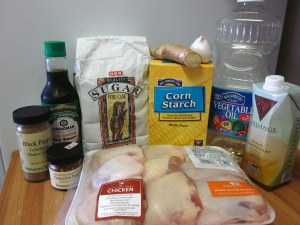
Austin Ingredients
Miami ingredients

Foodie Pen Pal Fun: Carbs of Pennsylvania

I’m back in the Foodie Pen Pal saddle this month with a splendid box from my new friend, Julie from Philadelphia. Julie and I have had great fun writing/tweeting back and forth about culinary delights in Philadelphia. If you’ve never been to Philly, you should definitely put it on your list of places to go! It’s a wonderful city with lots of history and tremendously tasty food options. One of the beautiful foodie joys of Philly is Reading Terminal Market. Julie got the treats for my box by wandering around the market and letting her “hungry guide her.” She said she sent me the “carbs of Pennsylvania.” I do enjoy me some carbs! Let’s get down to the nitty-gritty of what I got! Here’s the overview of everything.

Philly Foodie Pen Pal package

The sweets are up first. Yes, please, and thank you. The Red Laces were an impulse buy for Julie, but a total WIN for me. I love strawberry Twizzlers, and these are WAY better. The boyfriend is also a fan, and together, we’ve been making our way through the generous container. These are so fun. They stretch and are bendy so you can do fun things like tie them in a bow. The fruit flavor is intense, and gets you in the back of your throat just a little bit. It’s a no-joke strawberry taste that I adore. Nom nom nom.

They are so long and stretchy!

They are so long and stretchy!

They make it easy and fun to play with your food.

They make it easy and fun to play with your food.

Goldenburg’s Peanut Chews are also a delight for me. They are dark chocolate, peanuts, and caramel. It has a very distinctive bittersweet flavor from the dark chocolate and caramel.There is a touch of salt from the peanuts, and because it’s a bite-sized piece of candy, it’s all just the right amount. It is possible that Julie kept some of these back for herself, but I ain’t mad at ya, girl. I have plenty for me without being out of control. 🙂 I eat one after lunch and it’s just perfect.

The stick candy is so nostalgic and fun. I haven’t eaten them yet, because I’m waiting for the right opportunity. Boyfriend is also excited about them so I expect that I’ll have to share. But I believe that good flavors will abound.

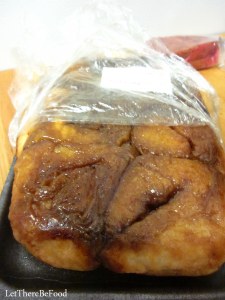
Y’all, I got some legit Amish sticky buns! They were cinnamony and yeasty, and a total delight to have for breakfast several mornings in a row. I warmed them up in both the microwave and the oven, and every time they were so good. I’m not one for frosting on my cinnamon rolls because I think it hides the cinnamon flavor and all you end up tasting is sugar. These buns were frosting free, and thus full of every flavor I could want in my cinnamon rolls. Thanks, Julie!

sticky buns
Sticky Buns!!

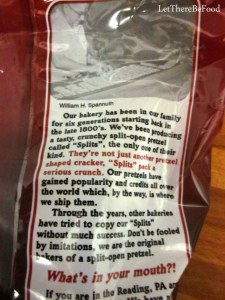
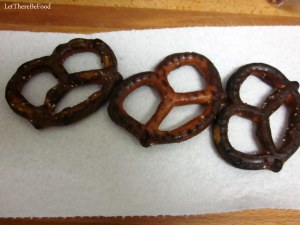
Julie also sent me a bag of extra dark split pretzels. To be honest, I thought the pretzels were covered in dark chocolate when I first saw the bag. That’s how dark they are. These pretzels are dark because they are “nicely burnt” (according to the bag) as part of the creation process. Back in the day, the burnt ends of pretzels were split off and sold. Eventually they became a favorite staple for so many that now they are made and sold as such. These are Julie’s favorite so I very much wanted to like them. Alas, these did not fall into my favorite category quite like the Red Laces or the Peanut Chews. But I do appreciate the exposure to them and knowing a little more about pretzel making in Philadelphia now.

pretzel history
dark pretzels

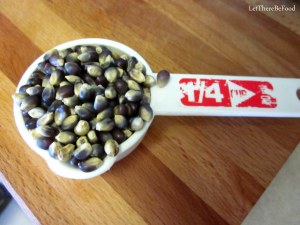
What Julie had no way of knowing when she sent the box, because we never talked about it, was that growing up popcorn was a staple in my home. It might as well have been its own food group. I pretty much love popcorn. So good. Blue popcorn is quite intriguing to me! I was a little disappointed to discover that the kernel does not stay blue when it is popped. Nonetheless, these small kernels had just the right crunch and burst of corn flavor for me.

blue corn

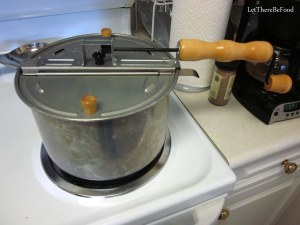
Popping corn is serious business in my kitchen.

Popping corn is serious business in my kitchen.

popped corn
The hand scrub smells like an herb garden and will be fabulous to use when I’m trying to get that garlic or onion smell off my hands or if I’ve got pesky pepper juice on my hands. The granules and pieces of herbs in the scrub will help remove unwanted oils or smells, for sure. So handy!

hand scrub

What a great “welcome back” box to get this month! I’m glad to be back in the program. If you are interested in joining up with us, head over to Lindsay’s blog at The Lean Green Bean. She has all the details you need to sign up. Like any good project, there are a few rules and guidelines to help everyone be successful. You must sign up by February 4th to receive your match. You have a spending limit of $15 per package/month. After shopping for your partner, you mail the lovely box on or before the 15th of the month. If you are a blogger, you post about the box you received on the last day of the month. And you agree not to send things to your partner that will make them sick. It’s pretty simple. 🙂 It’s a lot of fun to be a part of the whole swap, and there is a link-up party on Lindsay’s blog at the end of the month so you can see what other folks got as well. I hope you’ll join us.

Many thanks to Julie for her thoughtful purchases. Check out her awesome blog, What Julie Ate, and make some of her great recipes! She doesn’t disappoint! Until next time, happy eating!

The Lean Green Bean

Baked Scotch Eggs

Happy New Years Greetings my foodie friends! I hope the new year is treating you all well, and if you have made new year’s resolutions that you have had good luck in keeping them so far. Mostly, I don’t make resolutions in the traditional sense. However, I have made a one word resolution this year so I am excited to see how that unfolds. In the food realm, I’m aiming to learn to make black bean burgers and to practice using my slow cooker more. I don’t really feel like those are resolutions but “to do” list items. What about you? What are you hoping to do this year?

I’m excited to bring you my recipe for Baked Scotch Eggs to kick off the New Year! I’ve been sitting on this recipe for a while now, and I have no good reason for not sharing sooner. Please forgive me. This is a simple recipe, requiring few ingredients, that makes a fancy-feeling dinner, or an elegant breakfast. You can make this to impress just about anyone who digs on eggs and sausage. I have a little trick for you if you want to up the ante, it will knock the socks off anyone eating with you, and only you will know it was easy-peasy. That’s the best kind of trick, isn’t it?!

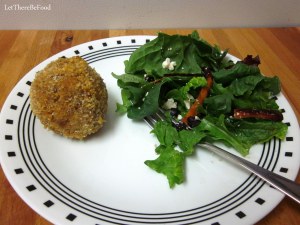
Scotch Egg and Salad

Baked Scotch Eggs

Ingredients
1 lb breakfast sausage*
5 eggs
1 tablespoon flour
1/3 cup Panko** breadcrumbs
Non-stick spray

Steps
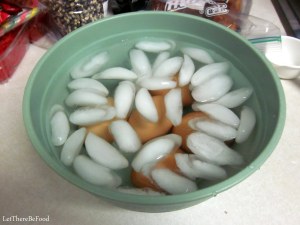
1. Cook your eggs with your preferred hard-boil method. I put eggs in a pan with cold water, then bring to a boil, and take off the heat for 7 minutes. Carefully transfer from the hot water into an ice bath, and let sit for 10 minutes before peeling.
Ice Bath
2. Preheat your oven to 400 degrees Fahrenheit (204.4 degrees Celsius). Line a jelly-roll pan with foil and put a cooling rack on it. Spray with non-stick spray.
3. Divide your sausage into 5 equal portions. If you have a scale, you are looking for 5 1/8 ounces (145.3 grams) per portion.
4. Take a peeled egg, roll it in the flour, and then shake off the excess. You want just a thin coating to help the sausage stick to the egg.
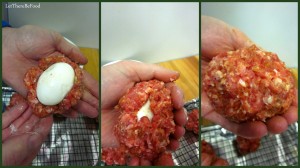
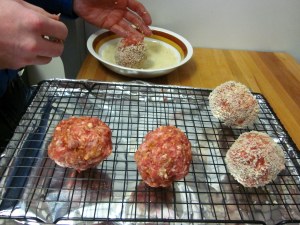
5. Very carefully, take the sausage portion and shape it around the egg. When you close it up, be sure to smooth the seam of the sausage over. (It may feel a bit like a middle school clay project!) Repeat for each egg.
6. Roll your sausage balls in the Panko to coat.*** Place on the cooling rack.
7. Put in the oven for 20 – 25 minutes. You want to make sure the sausage is no longer pink.

Sausage Portions

* Tip – If you wish to impress folks, you can make your own breakfast sausage. I promise you, it is not hard at all. Here’s how you do it.
– 1 lb ground pork
– 1 tablespoon Penzey’s breakfast sausage seasoning, or other breakfast sausage seasoning blend
– Mix it up with your hands and then use! See how easy that was!! It takes an extra couple of minutes, but you can tell everyone that you made your own sausage, and they’ll be totally wowed. Do it!

egg formation
** Here is a post that explains Panko breadcrumbs in detail in case this is your first time to be exposed to them. It’s worth the switch from regular breadcrumbs to Panko; I promise.

***My personal recommendation is to only put the Panko breadcrumbs on the eggs you plan on eating that meal. These make lovely leftovers, but the Panko doesn’t reheat well so if you know you’ll save two of them for lunch the following day, then skip the breadcrumbs on those two.

Panko Bath

Depending on your sausage approach, if you were using my dad’s good friend, Jimmy Dean, there are lots of flavor varieties that could spice up your eggs. If you are making your own, I think you can trust your own palate to know when and how to add more heat or flavors as you prefer. Trust your judgment. It is your kitchen, after all.

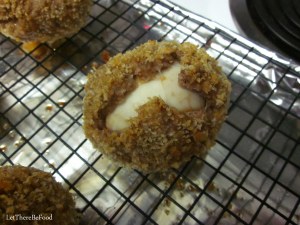
The aroma as these bake is heavenly. It makes me think of a weekend morning, even on a Thursday night. The layer of sausage around the eggs keeps them from overcooking which means the eggs come out soft and tender, wrapped inside a blanket of spicy sausage goodness. My preferred meal is to pair the Scotch Eggs with a salad or some steamed broccoli and carrot sticks to make sure that I get in my veggies. For leftovers, you could slice up the egg between some hearty bread for a breakfast sandwich that I am sure would be divine.

Whole Scotch Egg

As there are only a few ingredients in this recipe, I do encourage you to use the best ones you can find. My preference is to use eggs from one of my favorite vendors at the nearby farmer’s market, ground pork from Richardson Farms (also from the farmer’s market), and the breakfast sausage spice blend from Penzey’s. I like feeling connected to the people who grow/produce the items I buy, and I believe that the quality of my food is higher. Plus, knowing the sources of my food makes the meal more special for the boyfriend and me because we can go back and share with the vendors what we made with the items we bought. That’s always fun to do.

One final note: sometimes shaping the sausage is tricky. You think you’ve gotten it all smoothed out. You believe the seam is meshed together well, and then your scotch egg comes out of the oven looking like this.

Cracked Egg
Well, my friends, don’t despair. I assure you, it’s still edible, and your egg is still fine. It’s just a great reason to try again next week. After all, practice makes perfect, yes? I just want you to know you aren’t alone when this happens. Dig in, and happy eating!

Nutritional Information: 1 Scotch Egg
Calories: 350
Fat: 24 grams
Carbs: 2.6 grams
Protein: 30 grams
Calcium: 4.5%